


Retro Shooter Light Gun Modding Guide: Customize Your Setup
Table of Contents
Why Light Gun Modding Changes Your Arcade Setup
Retro Shooter Reaper Mods: What You Can Actually Build
Light Gun Compatibility: Guns, Displays, Adapters, and Emulators
Light Gun Mod Installation: Tools, Steps, and Safety
Retro Light Gun Calibration and Latency Troubleshooting
Game Library, Emulator Setup, and Legal ROM Guidance
Cost, Durability, and Reversibility: What to Know Before You Buy
Frequently Asked Questions
Last Updated: October 17, 2026
Why Light Gun Modding Changes Your Arcade Setup
Light gun modding is the practice of replacing or reshaping the outer shell, grips, and controls of a working light gun while keeping its internal electronics intact.
A stock gun aims fine. It just doesn't feel like anything. Swap the shell for a pulse rifle or a sawn-off shotgun profile and your arcade cabinet stops being a screen with a plastic accessory attached.
That's the honest pitch. Modding won't improve tracking or reduce latency, and anyone selling you a shell on those grounds is overselling.
Below, we'll walk through what's actually buildable, how compatibility works, how to install a kit without damaging the electronics, and how to calibrate afterward.
Retro Shooter Reaper Mods: What You Can Actually Build
Retro Shooter Reaper mods fall into three practical categories: full-body shell replacements, front-end barrel and muzzle kits, and grip or stock additions. Each changes a different part of the shooting experience.
Full-body replacements are the biggest job and the biggest payoff. You move the Reaper's board, sensor, and wiring into a new housing.
Barrel and muzzle kits are the low-risk entry point. They attach to the existing front end, add visual mass, and leave the electronics untouched. If you're new to this, start here.
Grip and stock additions solve a real ergonomic problem. Long sessions with a pistol-grip shell cramp the wrist. A shoulder stock or a fuller grip spreads the load.
Pro Tip Before you commit to a full-body build, weigh your donor gun with the new shell dry-fitted. A heavier front end shifts the balance point forward, and that changes how your arm fatigues over a two-hour session more than most people expect.
One caveat worth stating plainly: not every design suits every hand size. A chunky rifle shell looks spectacular on a shelf and can feel awkward if you have smaller hands. Ask about grip circumference before ordering anything custom.
Light Gun Compatibility: Guns, Displays, Adapters, and Emulators
Light gun compatibility comes down to four links in a chain: the gun, the display, the adapter or connection method, and the emulator.
Link in the Chain | What Matters | Common Failure Point | Quick Check |
Gun hardware | Sensor type and firmware support | Modded shell blocks or shadows the sensor window | Hold the new shell in place and test before screwing down |
Display | Panel type, refresh behavior, and surface finish | Glossy panels and unusual refresh rates confuse tracking | Try the gun on a second screen to isolate the display |
Adapter / connection | USB connection and driver support | Driver not installed before first use | Confirm the adapter lists your exact gun model |
Emulator | Per-game input configuration | Buttons mapped but not saved per game | Test in-game, not in the emulator menu |
Gun hardware. Modern light guns generally rely on screen-based tracking rather than the old CRT timing method, so the sensor needs a clear line of sight to the display.
Display. Panel behavior matters more than most buyers expect. If tracking feels jittery on one screen and fine on another, the display is the variable, not the gun.
Adapter and connection. A gun that works flawlessly on your PC setup may need a different adapter path on a console or a Raspberry Pi build.
Emulator. RetroArch and MAME both handle light gun input, and both let you store per-game parameters so each title keeps its own button mapping.
Watch Out The single most common compatibility failure we see is a modded shell that covers or shadows the sensor window. Test the gun with the new shell held in place, before you screw anything down permanently.
If you are unsure whether a specific gun, adapter, and emulator combination will work together, ask before ordering. A five-minute conversation beats a return.
Light Gun Mod Installation: Tools, Steps, and Safety
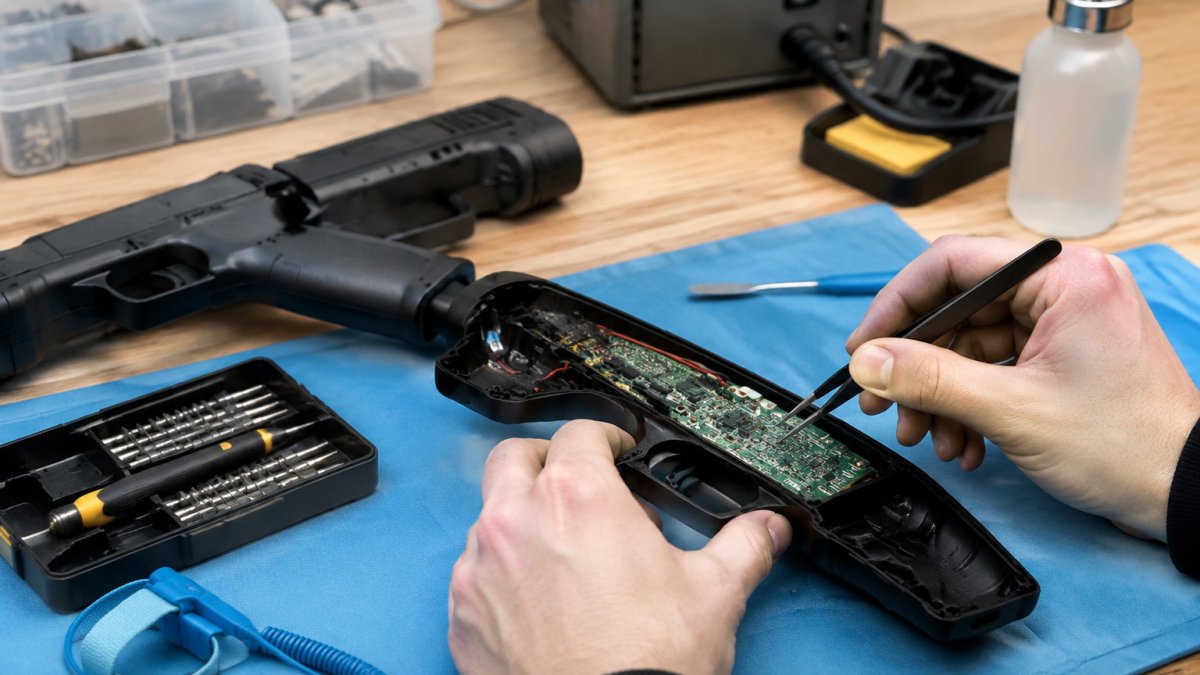
Light gun mod installation takes most people an evening, and the difficulty depends entirely on whether you're swapping a shell or adding an attachment.

What you'll need:
A precision screwdriver set matching your gun's fasteners
A small parts tray so screws don't vanish
A soft work surface or anti-static mat
Your mod kit and any printed instructions
A phone camera for photographing wiring before you disconnect anything
Step 1: Photograph everything before disassembly. Every connector, every cable route, every screw location. You will forget one, and the photo will save you.
Step 2: Power down and disconnect. Unplug the gun and let it sit. Don't open anything while it's connected.
Step 3: Remove the shell in the order the manufacturer intended. Work slowly around clips.
Step 4: Transfer the internals. Move the board, sensor, and wiring into the new housing.
Step 5: Dry-fit before final assembly. Close the shell loosely, test that the sensor window is clear, then tighten.
Step 6: Reassemble and test. Power on, confirm buttons register, and only then move to calibration.
Key Takeaway The whole installation succeeds or fails on step one. Photographing the wiring before disassembly is the difference between a clean rebuild and an evening spent guessing which connector went where.
Retro Light Gun Calibration and Latency Troubleshooting
Retro light gun calibration should be run after every shell change, every display change, and every emulator update.
Run the calibration routine, shoot each corner target steadily, and repeat the pass twice. A single sloppy pass produces drift that shows up later as a cursor that sits slightly off-center.
Latency is a separate problem from accuracy, and mixing them up wastes hours. If shots land in the wrong place, that's calibration. If shots land in the right place but arrive late, that's latency or input lag.
Symptom | Likely Cause | Fix |
Cursor sits slightly off-center | Sloppy calibration pass | Recalibrate, shoot corners steadily, repeat twice |
Aim drifts during a session | Sensor picking up reflections | Dim the room, move LED lights, try a matte screen |
Shots land in the wrong place | Calibration boundaries wrong | Rerun calibration after any shell or display change |
Shots land correctly but late | Display or emulator input lag | Enable game mode, check emulator frame delay, use wired USB |
Buttons register but aim doesn't | Sensor window blocked by shell | Dry-fit the shell and confirm the window is clear |
Works on one screen, not another | Display panel behavior | Test on a second screen to isolate the display |
Latency troubleshooting order:
Check the display's game mode is enabled
Confirm the emulator isn't adding frame delay
Test with a wired USB connection rather than a hub
Verify the driver is current
Reduce background load on the machine
Aiming that drifts during a session usually points to the sensor picking up reflections. Glossy screens, nearby LED lights, and bright windows all interfere. Try the gun in a darker room and see if the drift disappears.
Key Takeaway Calibrate first, then chase latency. Most "lag" complaints turn out to be calibration drift, and most "drift" complaints turn out to be reflections. Test in that order and you will save an evening.
Game Library, Emulator Setup, and Legal ROM Guidance
Emulator setup for light gun games follows a predictable pattern: install the emulator, point it at your game folder, configure the gun as an input device, then save that configuration per game. RetroArch and MAME both handle light gun input, and both let you store per-game parameters so each title keeps its own button mapping.
Folder structure matters more than people expect. Keep one folder per system, with clean, consistently named ROM files. Inconsistent naming breaks metadata scraping and turns your game library into a wall of unrecognizable filenames.
Button mapping deserves its own pass. Map the trigger, reload, and any secondary action, then test in-game rather than in the emulator menu. Some titles expect a specific input configuration, and the emulator's defaults won't match.
Watch Out Only use game files you are legally entitled to use. Ripping ROMs from cartridges or discs you own is treated differently from downloading them, and the rules vary by country. Check your local law before building a library, and never download copyrighted game files from the internet.
Cost, Durability, and Reversibility: What to Know Before You Buy
Three questions decide whether a mod kit is worth it: what it costs, how it holds up, and whether you can undo it.
On cost, pricing for custom kits depends on the design, the material, and the finish, so we'd rather you check current pricing on our site than read a number here that goes stale.
Durability is the fair concern. A modded gun you play with weekly will see handling that a display piece never does. Ask how a kit handles regular use, and be suspicious of any answer that dodges the question.
Reversibility is the quiet advantage of modding over buying a pre-built replica. A mod kit leaves your original hardware intact, so you can return to stock if a design doesn't suit you.
Pro Tip Keep every original part in a labeled bag when you mod. If you ever sell the gun or want to try a different shell, having the stock hardware ready turns a permanent change into a swap.
For fit questions on Sinden and Retro Shooter hardware, installation difficulty, or turnaround on a custom order, ask us directly before ordering. A five-minute conversation beats a return.
Frequently Asked Questions
How do you mod a Retro Shooter light gun?
Start by checking your exact model and the mod kit's stated fit. Power the gun off and remove the battery. Unscrew the shell, keep the screws in a labelled tray, and separate the halves gently so you do not pull on wiring. Swap or fit the new shell or parts, then reassemble in reverse order. Test buttons and aiming before closing everything up. If a kit includes a guide, follow its sequence rather than improvising, and stop if any part needs force to fit.
Which mods are compatible with Retro Shooter light guns?
Compatibility depends on the model, not just the brand. Retro Shooter has produced several generations, and shell shapes and screw points differ between them. Before ordering, confirm the kit lists your specific model, check whether it is for a Reaper or another frame, and ask the seller if the listing is unclear. Kits designed for one generation often will not fit another without modification, so verify first rather than assuming a universal fit.
Can you turn a Retro Shooter Reaper into a shotgun or pulse rifle?
Yes, that is the core idea behind Reaper mods. Shell kits replace the stock outer casing with a shotgun or pulse rifle style body while keeping the original electronics and buttons. The internal board, lens, and wiring stay in place, so aiming behaviour should be unchanged if the install is done correctly. The result is a functional gun you can still play with, not a display-only prop, provided you follow the kit's fitting instructions.
Do light gun mods affect calibration or gameplay?
A shell-only mod should not change how the gun tracks, because the sensor and lens are untouched. If you move or pinch the lens during installation, aiming can drift, so recalibrate after reassembly. Button mapping can change if the kit reroutes switches, so test every button in your emulator front end. If aim is off after a mod, recheck that the shell is fully seated and screws are evenly tightened before adjusting software settings.
How do you maintain a customized retro light gun?
Treat it like any plastic hardware. Keep it away from direct heat, wipe the shell with a dry or slightly damp cloth, and avoid solvents that can dull 3D-printed surfaces. Check screws every few sessions, since modded shells can loosen with heavy use. Store the gun where it will not get knocked off a shelf. If buttons feel sticky, open the shell and clean around the switches rather than spraying cleaner into the seams.
Can you reverse a light gun mod and restore the original setup?
In most cases yes, if you keep the original shell and parts. Store the stock casing, screws, and any removed pieces together in a labelled bag. Reversing means opening the modded shell, moving the electronics back, and reassembling the original. The main risk is stripped screw holes from repeated opening, so do not over-tighten. If you plan to swap between looks, choose a kit that is designed for repeated disassembly.
Building a retro arcade setup is a series of small decisions that add up to something you actually want to sit down at. The gun is the part you touch most, so it's worth getting right. At Tcarterdesigns, we make custom light gun mods for Retro Shooter hardware, including pulse rifle and shotgun style kits, designed to install cleanly and keep your electronics working. Browse the shop and pick the shell that matches the game you keep coming back to.
Shop
Comments