


Preventing Static Damage During Controller Repairs
Last Updated: November 12, 2026
Quick Summary
Preventing static damage during controller repairs means grounding yourself with an anti-static wrist strap and working on a grounded anti-static mat before you open the shell. Unplug the controller, remove the battery, and touch only the board's edges, since most electrostatic damage occurs at levels far below human perception.
Grounding takes less than a minute and must last the whole repair, not just the start.
A strap clipped to painted metal does nothing; the clip needs bare metal that reaches earth.
Touch only board edges and never pins, chips, flex-cable contacts, or gold pads.
Store spare boards in anti-static bags, never plain plastic, bubble wrap, or zip-top bags.
Most ESD damage is latent, so a controller that passes an immediate test is not automatically in the clear.
Ready to mod your light gun safely?
Custom 3D-printed light gun mods for Retro Shooter hardware, designed for easy installation.
Table of Contents
Why Static Damage Is the Silent Killer of Controller Repairs
Static damage is the invisible fault that can turn a working controller into a dead one during a repair. A single careless touch can undo hours of careful work. The worst part? You often won't notice it right away.
Electrostatic discharge (ESD) is a sudden flow of static electricity between two objects at different charges (EOS/ESD Fundamentals Part 1). It happens in a fraction of a second. You feel nothing. The controller board feels everything.
Here is what makes it so sneaky:
A discharge you can feel is far stronger than the level that damages electronics
Damage can be partial, so the board works for weeks before failing
The tiny integrated circuits inside a controller are ESD-sensitive components
Dry indoor air makes charge buildup worse, especially in winter
The ESD Association's guide to static control explains that most electrostatic damage occurs at levels far below human perception. That means "I didn't feel a shock" proves nothing.
A common mistake is testing a board while it sits on a carpeted floor or a sofa cushion. Both surfaces hold static charge. Always work on a hard, grounded surface instead.
Grounding Yourself Before Electronics Repair
Grounding is the first step in every repair, and it takes less than a minute. It means connecting your body to earth so any static charge drains away safely instead of jumping into a circuit board.
Follow these steps before you open any controller:
Unplug the controller and remove the battery or power source
Put on an anti-static wrist strap and clip it to a grounded point
Touch the bare metal of a grounded frame for a few seconds
Keep the strap on for the whole repair, not just the start
What most guides miss is that grounding only works if the connection is real. A strap clipped to a painted desk leg does nothing. The clip needs bare metal that actually reaches earth.
If you plan to customize your hardware, our Retro Shooter light gun modding guide reinforces these safe handling habits from the first screw to the final test.
Choosing an Anti-Static Wrist Strap for Electronics Repair
An anti-static wrist strap for electronics repair is a simple band that connects your skin to a ground point through a resistor.
Not all straps are equal. Here is what to check before you buy:
Fit: the band should sit snug against bare skin, not over a sleeve
Cord: coiled cords stretch and retract, straight cords tangle less
Resistor: a built-in resistor is the safe standard for repair work
Clip: a solid alligator clip grips bare metal better than a cheap hook
Watch out: a loose strap that slips off mid-repair leaves you ungrounded without warning. Check the fit each time you sit down.
Test the strap before you trust it. If you don't have a continuity tester, inspect the cord for cracks and replace any strap that looks worn.
Setting Up an Anti-Static Mat for Circuit Board Repair
An anti-static mat for circuit board repair gives you a grounded work surface where loose screws, tools, and boards can rest safely. It protects the parts even when they aren't in your hands.

Set up the mat in four steps:
Lay the mat flat on a hard, clean desk
Connect the mat's ground cord to a proper earth point
Clip your wrist strap to the mat's snap, so you and the mat share one ground
Wipe the surface clean before each session
The mat only works when it's connected. An ungrounded mat is just a rubber sheet. A common mistake is buying a mat and skipping the ground cord, then wondering why boards still fail.
For deeper safety guidance on opening and modding your hardware, see our guide on whether light gun mods can damage electronics.
Handling and Storing Controller Circuit Boards Safely
Handling and storing controller circuit boards comes down to one rule: touch the edges, never the components. Your fingers carry oils and static, and both cause problems. But controllers have specific weak points that generic electronics advice doesn't call out, and knowing them changes how you move your hands.
Controller-specific vulnerable parts to watch:
Ribbon and flex cables, the thin flat cables linking the main board to trigger and sensor boards. They crack at the fold if you bend them past their natural curve, and the exposed contacts at each end are easy to touch by accident.
Exposed connector pins, the row of pins where cables plug in. These are directly connected to ICs and are the shortest path for a static discharge into the board.
IC pins and sensor boards, the small chips and optical sensor assemblies. Their pins are fine enough that a discharge you can't feel can bridge them.
Gold contact pads, button and trigger contacts. Skin oils and static both degrade them, and cleaning them repeatedly wears the plating.
Follow these habits:
Lift boards by the outer edges only
Never touch pins, chips, flex-cable contacts, or gold pads with bare fingers
Place boards component-side up on the mat
Store spare boards in anti-static bags, never in plain plastic
Keep boards away from carpet, foam packing, and clothing
Coil flex cables loosely, never fold them sharply or crease them
The NASA workmanship standards for electrostatic protection treat ESD control as a core part of any electronics handling process. If it matters for spacecraft, it matters for your controller.
Watch out: ordinary zip-top bags and bubble wrap generate static. They are the wrong storage choice for any circuit board.
If you're opening a Sinden controller for the first time, our Sinden light gun mod guide covers the safe way to handle the board once the shell is off.
A Controller-Specific Repair Workflow That Prevents Static Damage
Most ESD advice is written for generic electronics. Controllers have their own weak points, and a repair workflow built around them keeps static damage out of the picture.
Here is the sequence we recommend:
Step | Action | Why It Matters |
1 | Power down and remove batteries | Live power plus static is the worst combo |
2 | Ground yourself with a wrist strap | Drains your charge before it reaches the board |
3 | Work on a grounded anti-static mat | Protects loose parts and tools |
4 | Open the shell, touch only edges | Keeps fingers off ESD-sensitive components |
5 | Set screws and parts on the mat | Stops parts rolling onto charged surfaces |
6 | Reassemble and test on the mat | Catches faults before the case goes back on |
Controller-specific vulnerable parts include the trigger switches, the sensor board, and the ribbon cables that link them. These are small, thin, and easy to stress. Handle them last, and handle them gently.
For a full walkthrough of installing mods without harming the board, our step-by-step retro shooter mod install guide pairs well with this workflow.
What to Do After a Suspected Static Discharge
If you hear a snap, feel a tingle, or see the controller behave oddly after a repair, treat it as a possible static event. Acting fast limits the damage.
Do this in order:
Stop and unplug the controller
Remove the battery or power source, power isolation is separate from static control, and you should never troubleshoot a live board
Re-check your ground connection before touching anything
Inspect the board under good light for visible damage: scorch marks, cracked or chipped chips, discolored pins, or a flex cable with a crease
Re-seat connectors and flex cables carefully, touching only the edges
Test the controller on a known-good setup
If it fails, replace suspect parts rather than forcing a fix
Diagnosing a latent failure takes patience. A common pattern is a button or trigger that works most of the time but drops inputs under load or after warm-up. If you suspect a partial discharge, test every input methodically, press each button and trigger repeatedly, watch for missed or double inputs, and compare against a second controller if you have one.
Watch out: don't assume a controller that powers on is undamaged. A discharge that damages one input path can leave the rest of the board working, which makes the fault easy to miss until it strands you mid-game.
When a component needs swapping, our guide on replacing light gun buttons and switches safely walks through the process without adding more risk.
Prepping Your Light Gun Mod for Static-Safe Installation
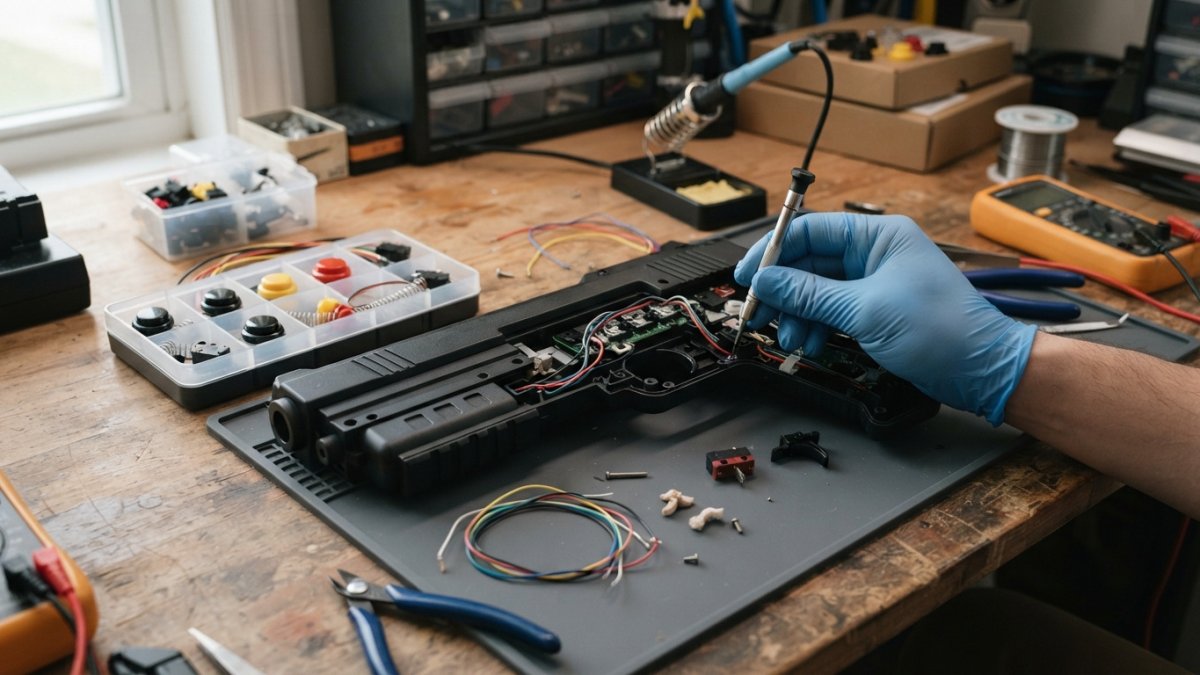
A light gun mod is the fun part, but it still starts with a clean, grounded workspace. The kit itself is simple to fit. The electronics underneath are what need protecting.
Before you install any mod, run this checklist:
Controller powered off and unplugged
Battery removed
Wrist strap fitted and tested
Anti-static mat grounded
Screws and small parts in a tray on the mat
Board handled by the edges only
Work area clear of carpet and foam
Tcarterdesigns builds mods for Retro Shooter hardware, with easy-to-install kits that transform standard guns into iconic replicas such as the Aliens Pulse Rifle and custom shotgun styles. The static precautions are what keep the install straightforward.
Our safe mod installation guide goes deeper on protecting your electronics while you customize. Take the extra minute. Your controller will thank you.
Static damage is the one repair risk you can eliminate before you even pick up a screwdriver. If you're ready to upgrade your setup without putting your hardware at risk, Tcarterdesigns has you covered. Our custom light gun mods are built for Retro Shooter hardware, with transformative designs and easy-to-install kits that make customization simple.
Frequently Asked Questions
Which is the most effective way to prevent ESD damage?
The most effective approach combines a grounded work surface with a wrist strap. Place an anti-static mat on your bench, connect it to a known ground point, and wear an anti-static wrist strap that ties you to the same ground. This keeps you and the board at the same electrical potential, so static charge cannot build up and discharge into ESD-sensitive components. Add careful handling by the edges and store boards in anti-static packaging when they are not in use.
Do you need an anti-static mat to repair a game controller?
You can repair a controller without a mat, but a mat makes static control far more reliable. An anti-static mat for circuit board repair gives you a grounded work surface where loose screws, tools, and the controller board itself sit safely. If you skip the mat, at least ground yourself with a wrist strap and work on a hard, non-carpeted surface. Never place a bare controller board on carpet, clothing, or a plastic bag, since those materials encourage charge buildup.
Can static electricity ruin electronics like a controller board?
Yes. Static discharge can damage ESD-sensitive components on a controller board, including the integrated circuits that handle input and communication. Damage is not always obvious: a board may work at first and fail later, or a single button may stop responding. Because the effect can be delayed, technicians treat every controller board as vulnerable and follow ESD precautions even when nothing seems wrong. This is why grounding and careful component handling matter on every repair.
How should you store a controller circuit board after removing it?
Store a removed controller board in anti-static packaging, such as a shielded bag or a dedicated anti-static tray, and keep it away from foam, plastic wrap, and carpet. Label the bag so you know which controller it came from. Before reinstalling, ground yourself again and handle the board by the edges. If you are installing a custom light gun mod, keep the original board in its anti-static bag until the moment it goes back into the shell.
Comments