


Best Arcade Light Gun Accessories 2026
Table of Contents
What Makes the Best Arcade Light Gun Accessories
Quick Comparison: Top Arcade Light Gun Accessories for 2026
Retro Shooter Light Gun Mods: Custom Designs That Transform Your Setup
3D Printed Light Gun Shells: Aesthetic Upgrades for Iconic Replicas
Light Gun Accessory Kits: Complete Solutions for Your Build
Kit vs. Individual Components: Which Makes Sense
Compatibility Notes by System
What to Evaluate Before You Buy
Light Gun Compatibility and Installation: Ensuring Your Mods Fit
How to Choose the Right Accessories for Your Arcade Setup
Compatibility Matrix: Gun System, Display, and Accessory
Pricing Tiers: Budget, Mid-Range, and Premium
Troubleshooting and Calibration
Ergonomics, Multiplayer, and Accessibility
A Simple Decision Sequence
Frequently Asked Questions
Last Updated: October 12, 2026
What Makes the Best Arcade Light Gun Accessories
At Tcarterdesigns, arcade light gun accessories aren't just cosmetic upgrades, they're functional improvements. Whether you're building a home arcade cabinet or customizing a Retro Shooter light gun, the right accessories make a measurable difference.
The accessories that matter most fall into three categories: aesthetic modifications, compatibility hardware, and performance upgrades. This guide covers the best arcade light gun accessories for 2026.
Quick Comparison: Top Arcade Light Gun Accessories for 2026
Accessory Type | Best For | Key Benefit | Installation |
Tcarterdesigns Custom Shells | Retro Shooter users seeking iconic replicas | Transforms standard gun into Aliens Pulse Rifle or custom shotgun | Easy-to-install |
3D-Printed Light Gun Shells | Budget-conscious builders | Affordable aesthetic upgrades with customizable designs | Snap-fit or adhesive mounting |
Sensor Bar Upgrades | IR-based tracking systems | Improved accuracy and reduced dead zones | Plug-and-play installation |
Light Gun Compatibility Kits | Multi-system builds | Ensures proper fit across Gun4IR, Sinden, and AimTrak systems | Varies by kit |
Mounting Brackets | Cabinet integration | Stable positioning for arcade cabinets | Screw-mounted, 10-15 minutes |
Calibration Accessories | All light gun systems | Enhanced aiming precision and consistency | Software-based, no hardware changes |
Retro Shooter Light Gun Mods: Custom Designs That Transform Your Setup
Custom light gun mods for Retro Shooter hardware are the most transformative accessory category, replacing the standard shell with iconic weapon replicas.

Tcarterdesigns specializes in these mods, replicating weapons from classic arcade games. The Aliens Pulse Rifle shell and custom shotgun designs fit Retro Shooter light guns without compromising electronics or tracking.
What makes these mods work is internal fit.
Durability questions are valid: these mods handle regular gameplay and repeated trigger pulls.
Pro Tip Before installing any custom shell, verify that the original trigger mechanism moves freely inside the new housing. A tight fit that restricts trigger travel will cause tracking inconsistencies during gameplay.
3D Printed Light Gun Shells: Aesthetic Upgrades for Iconic Replicas
3D-printed shells are the most accessible entry point for light gun customization, often available as standalone upgrades that snap onto or adhere to existing hardware.
The appeal is straightforward: transform a generic black controller into a recognizable weapon from your favorite arcade game.
Installation methods vary: snap-fit designs require no adhesive and are reversible, while epoxy or contact cement offers permanent mounting with more security for active gameplay.
Pricing depends on complexity, material, and print resolution, with custom orders commanding premium pricing.
Watch Out Avoid applying heat or pressure to printed shells during installation unless the manufacturer explicitly approves the method. Some materials warp or become brittle under stress, potentially compromising fit or structural integrity.
Light Gun Accessory Kits: Complete Solutions for Your Build
Complete accessory kits bundle mounting hardware, sensor or IR emitter upgrades, cable management, and compatibility adapters. The real decision is whether a kit matches your gun system, display, and cabinet dimensions, most kits are built around one tracking family, so a Sinden kit won't fit a Gun4IR build.
A typical arcade light gun kit breaks down into five component groups:
Mounting hardware, brackets, M6 or M4 bolts, and cradles sized for standard cabinet panel thickness. Adjustability matters more than raw strength; a fixed-angle bracket forces you to reposition your display or stance.
Sensor bar or IR emitter assembly, the tracking heart of the kit. Emitter spacing and beam angle determine whether the gun reads accurately at screen edges or drifts near corners.
Cable management, strain relief, clips, and often a USB or DIN extension. Cheap kits skimp here, causing intermittent connectivity after months of cabinet vibration.
Pro Tip Before buying a kit, measure your cabinet's interior depth and the distance from your intended gun position to the screen. Most tracking problems blamed on the gun are actually sensor bar placement problems caused by a kit whose cables or brackets were sized for a different cabinet.
Kit vs. Individual Components: Which Makes Sense
Kits win when building a cabinet from scratch and you want one vendor to guarantee the brackets, emitters, and cables work together, plus simpler returns.
Buying individually wins when you already own part of the setup, if you have a working sensor bar and only need a bracket, a kit forces you to pay for unused components.
A common pattern: start with a kit for the first gun, then buy individual components for the second and third once you know which parts matter, usually cheaper than three full kits.
Compatibility Notes by System
Gun4IR, kits focus on IR emitter placement and USB cabling; verify the kit supports your specific emitter board revision, since pinouts have changed across versions.
Sinden, Sinden's tracking depends on a camera in the gun reading a display border, so kits tend to include display-border materials and calibration aids rather than a traditional sensor bar.
AimTrak, older system, so kits are less common; most owners source sensor bars and brackets individually.
Watch Out Do not assume a kit labeled 'universal' will fit your gun. Universal usually means the mounting plate has multiple hole patterns, not that the sensor or cable components are correct for every tracking system. Check the compatibility list line by line before ordering.
Best For Home arcade builders integrating a single light gun system into a custom cabinet who want a coordinated, single-vendor solution rather than sourcing brackets, emitters, and cables separately.
What to Evaluate Before You Buy
Mounting hardware quality and adjustability, can you tilt and lock the gun angle?
Explicit compatibility with your light gun system, not a generic 'works with most guns' claim
Sensor bar or IR emitter specifications, including emitter count and beam angle
If a kit does not list its emitter specifications or its exact bracket dimensions, ask the vendor before purchasing. Those two details determine whether the kit will actually work in your cabinet, and they are the details most often missing from product pages.
Light Gun Compatibility and Installation: Ensuring Your Mods Fit
Compatibility separates successful mod installations from frustrating failures.
Before purchasing, verify compatibility with your specific light gun model. Tcarterdesigns provides compatibility information for each mod; if documentation is unclear, contact the manufacturer rather than installing on an untested system.
Installation steps vary by accessory type:
For Custom Shells:
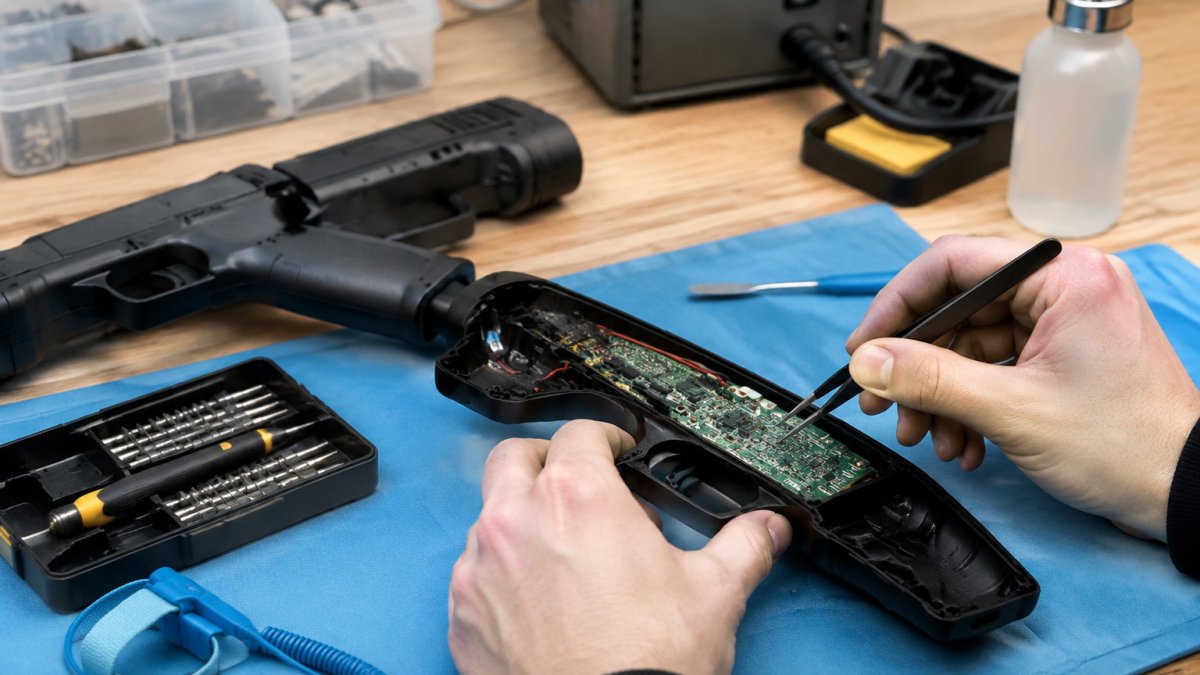
Remove the original controller housing (typically 2-4 screws)
Carefully disconnect any ribbon cables from the circuit board
Transfer the circuit board and internal components to the new shell
Reconnect ribbon cables, ensuring proper seating
Test trigger and button functionality before final assembly
Secure the shell housing with provided fasteners
For Mounting Brackets:
Identify mounting points on your arcade cabinet
Drill or use existing holes to position the bracket
Secure the bracket with appropriate fasteners (usually M6 bolts)
Mount the light gun to the bracket using the provided clamp or cradle
Adjust angle and height for comfortable aiming
Test stability under normal gameplay conditions
For Sensor Upgrades:
Power down the system completely
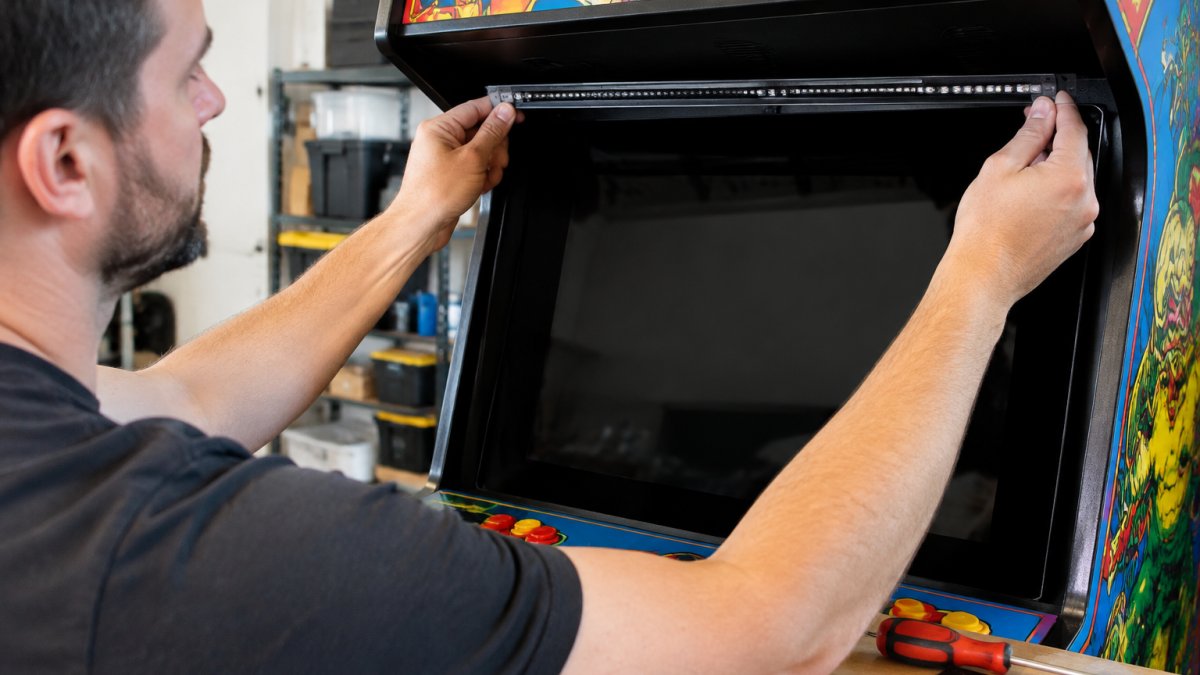
Disconnect the existing sensor bar from the light gun
Connect the new sensor bar following the manufacturer's wiring diagram
Mount the new sensor bar above or below the display
Run calibration software to establish baseline tracking
Test aiming across the full screen to verify accuracy
Common mistakes include over-tightening fasteners (cracking printed components), failing to fully seat ribbon cables (intermittent connectivity), and incorrect sensor bar positioning (dead zones). Verify functionality before moving on.
How to Choose the Right Accessories for Your Arcade Setup
Choosing accessories is a compatibility problem before it is a budget problem. Decide in this order: gun system, display, cabinet, then accessories, and most fit problems disappear before they happen.
Compatibility Matrix: Gun System, Display, and Accessory
Gun System | Tracking Method | Sensor Bar Needed? | Display Notes | Accessory Priority |
Gun4IR | Infrared emitters + camera in gun | Yes, IR emitter assembly | Works with LCD, OLED, and CRT; avoid direct sunlight on emitters | Emitter quality and placement |
Sinden | Camera in gun reads display border | No traditional sensor bar; uses border | Requires a visible border; some LCDs need border material | Display border and calibration aids |
AimTrak | Infrared sensor bar | Yes, sensor bar | Best with stable, non-reflective displays | Sensor bar and mounting bracket |
Retro Shooter | Infrared-based | Yes, depending on model | Standard LCD arcade displays | Shell compatibility and mounting |
This matrix is the single most useful tool for avoiding a bad purchase. If your gun system is Sinden, a sensor bar upgrade is wasted money; if it's Gun4IR, a display border kit does nothing. Match the accessory to the tracking method first.
Pricing Tiers: Budget, Mid-Range, and Premium
Prices shift with vendors and materials, so treat these as tiers:
Budget tier, basic 3D-printed shells, generic mounting brackets, and off-the-shelf sensor bars. Expect visible print lines, less adjustability, and minimal documentation. Fine for display setups or a first experiment.
Mid-range tier, resin-printed or higher-resolution shells, adjustable brackets, and branded emitter assemblies. This is where most home arcade builders land, because fit and finish improve noticeably without custom-order pricing.
Premium tier, custom-designed shells engineered for a specific gun model, precision mounting hardware, and bundled calibration support. The value is in fit and durability rather than cosmetics alone.
Troubleshooting and Calibration
Most light gun problems fall into four categories, and each has a known fix:
Aiming drift, usually caused by a loose mounting bracket or a gun that shifts during play. Tighten the bracket, then recalibrate. If drift returns within a session, the mount is the problem, not the software.
Tracking loss at screen edges, typically an emitter placement issue. Move the sensor bar or emitters so the beam covers the full screen area, and check that nothing blocks the line of sight from the gun to the emitters.
Lighting interference, direct sunlight, halogen lamps, and some LED fixtures emit infrared that competes with your emitters. Test by playing with the room lights off; if accuracy improves, add curtains or reposition the emitters away from the light source.
Key Takeaway Calibrate after every physical change to the setup, new bracket, new shell, moved sensor bar, or rearranged room lighting. Calibration is not a one-time step; it is the final check after any hardware change.
Ergonomics, Multiplayer, and Accessibility
Accessories also affect how long you can comfortably play and whether a second player can join without friction.
Grip comfort, custom shells change the grip profile. A shell that looks accurate but has a narrow or sharp grip will cause fatigue in longer sessions. Test grip feel before committing to a permanent adhesive mount.
Recoil and weight, adding weight to a gun can improve the feel of recoil but also increases fatigue. For younger players or long sessions, lighter shells are usually the better choice.
Cable management, a holster or cable clip keeps the gun cable from dragging across the cabinet and reduces strain on the connector, which is a common failure point.
A Simple Decision Sequence
Identify your gun system and its tracking method.
Confirm your display works with that method, or add the accessory that makes it work.
Choose mounting hardware that is adjustable and matches your cabinet dimensions.
Upgrade emitters or sensor bars only if your system uses them.
Add cosmetic shells last, once tracking is reliable.
Recalibrate and test with two players before finalizing the build.
Following that sequence keeps you from buying accessories that cannot work with your setup and puts money where it affects gameplay: tracking accuracy, mounting stability, and comfort over long sessions.
Frequently Asked Questions
What accessories do you need for a complete arcade light gun setup?
A functional arcade light gun setup requires the core light gun hardware (like Sinden or Retro Shooter), an IR emitter or sensor bar for tracking, a compatible display, and mounting hardware. Aesthetic upgrades such as 3D-printed shells, custom stocks, or tactical accessories enhance immersion but aren't strictly necessary for gameplay. Accessory kits bundle many of these components together, making setup simpler for builders.
Are 3D printed light gun shells compatible with every light gun model?
No. 3D printed light gun shells are designed for specific hardware platforms. Retro Shooter light gun mods, for example, are engineered to fit Retro Shooter hardware without interfering with sensors or electronics. Before purchasing any shell or mod kit, verify that it explicitly supports your light gun model. Compatibility information should be clearly stated by the manufacturer.
How difficult is it to install a light gun accessory kit?
Installation difficulty varies by kit type. Most 3D-printed shells and aesthetic mods are designed for easy installation, requiring only careful alignment and sometimes adhesive or fasteners. Kits that integrate electronics or IR emitters may demand more technical skill. Quality light gun accessory kits include clear instructions and are built to be user-friendly, but always review the specific installation guide before purchasing.
What should you check before buying a light gun accessory kit?
Before purchasing, verify compatibility with your specific light gun model and arcade cabinet setup. Check whether the kit requires any tools or special skills. Confirm the manufacturer's return policy and shipping timeline, especially if you're working on a deadline. Ensure the kit includes all necessary components and hardware.
Shop
Comments